
 エーテル
エーテルI visited Los Angeles for a business trip in January 2026! LA is drawing more visitors than ever — Dodgers games, the upcoming World Cup, the Olympics. But there’s one thing that trips up almost every first-time visitor at LAX: you cannot call an Uber or taxi directly at the arrivals hall.
I’ve used Uber across multiple countries — Frankfurt, Rome, and beyond — but LAX has its own rules that caught me off guard the first time.
This guide covers everything from the Tom Bradley International Terminal (Terminal B) — where most international flights arrive — to boarding your Uber at LAX-it, with photos taken on-site in January 2026.
If you’re a cautious traveler heading to LA, read this once and you’ll never be stranded at the airport.
The short answer: You cannot request an Uber from the terminal at LAX. First, travel to the dedicated pickup facility called LAX-it, then open the Uber app and select your pickup zone.
Prepare Before You Fly: 3 Things to Set Up at Home
The eSIM I used for this trip — and every international trip since — is Airalo. You buy it from your phone before departure, it activates the moment you land, and the North America plan covers California with solid LTE. Setup takes about five minutes. If you want a step-by-step walkthrough, I’ve written a full guide linked below.
Why You Can’t Get an Uber at the Terminal: The LAX-it Rule

To reduce traffic congestion around the terminals, LAX has completely separated all taxi and rideshare (Uber/Lyft) pickups from the terminal buildings.
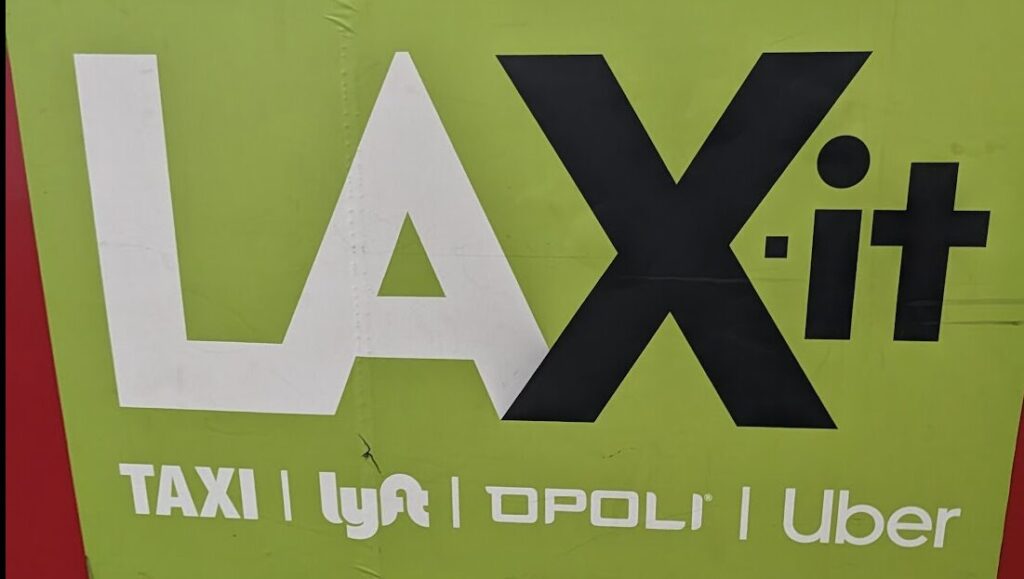
The dedicated facility is called LAX-it. Think of it as “LAX, exit” — the place you go to leave the airport.
Opening the Uber app at the arrivals curb won’t work. Your driver will not come to the terminal. You must travel to LAX-it first.
[Photo Guide] How to Get to LAX-it from Terminal B
Most direct international flights arrive at Terminal B (Tom Bradley International Terminal). Walking to LAX-it from there would take nearly 20 minutes and the route isn’t obvious, so use the free shuttle bus. The same process applies regardless of which terminal you arrive at.
The steps are surprisingly simple.
Step 1: Where Is the LAX-it Shuttle Stop at Terminal B?
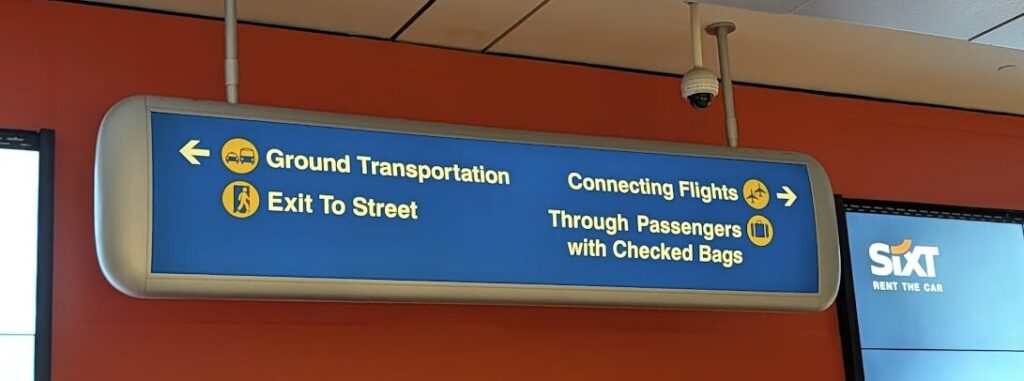
After clearing immigration and collecting your checked bags, head for the exit. Follow signs for “Exit to Street” — it’s mostly a straight path through arrivals.
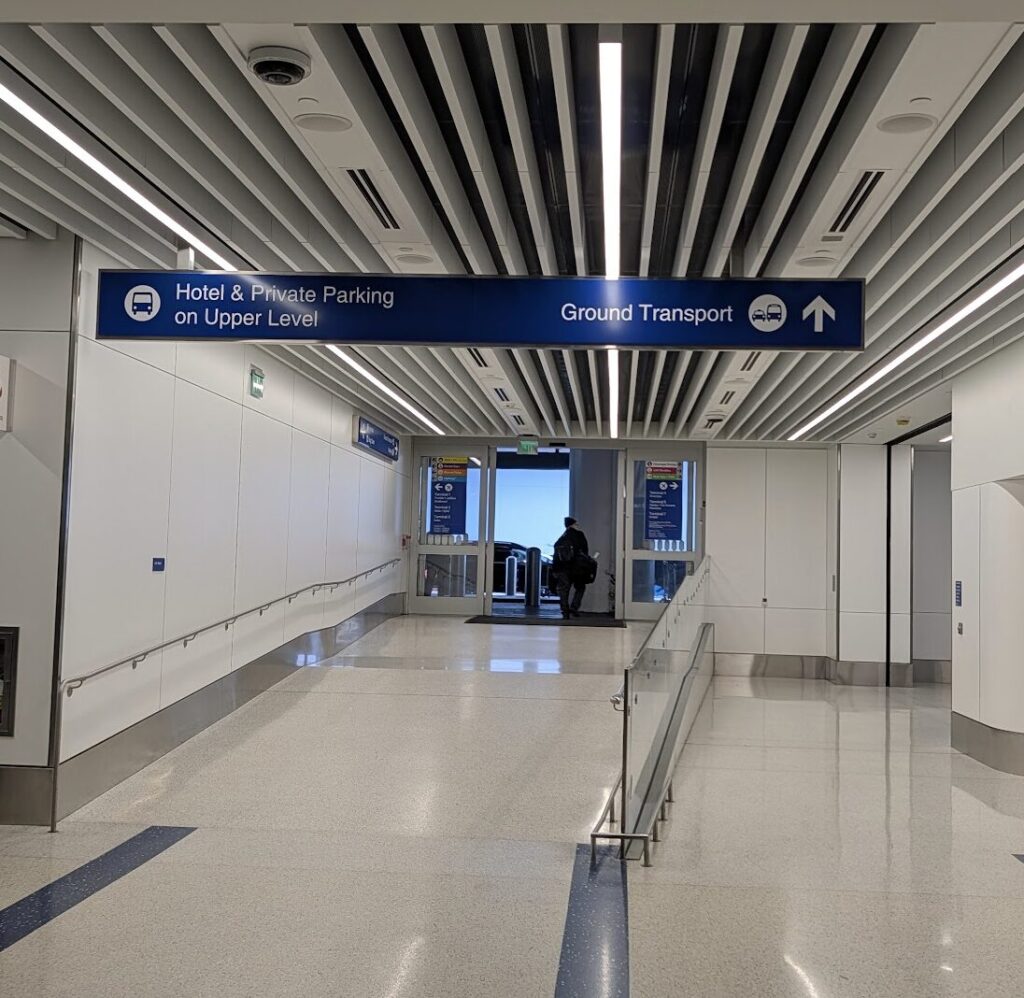
Once you reach the arrivals hall, use “Ground Transport” as your landmark and step outside. Any exit door will work.
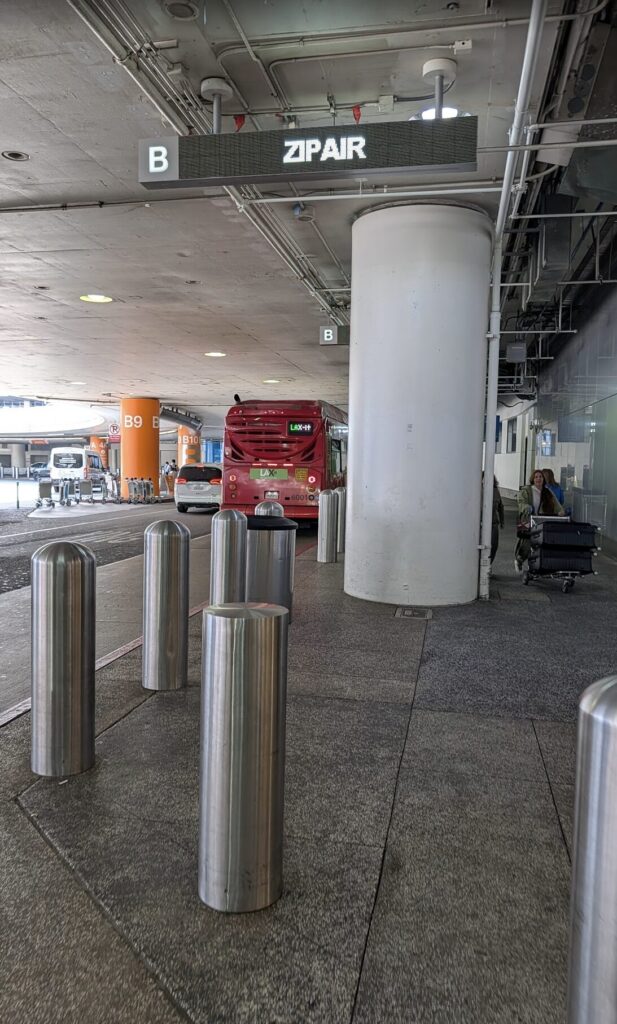
Once outside, scan the area for a bright green pillar marked “LAX-it.” That’s your shuttle stop.
 エーテル
エーテルThe exact door you exit from can vary depending on your gate and foot traffic. Don’t overthink it — just get outside and look for the green LAX-it sign. There are always staff in green uniforms nearby, so if you’re unsure, just ask.
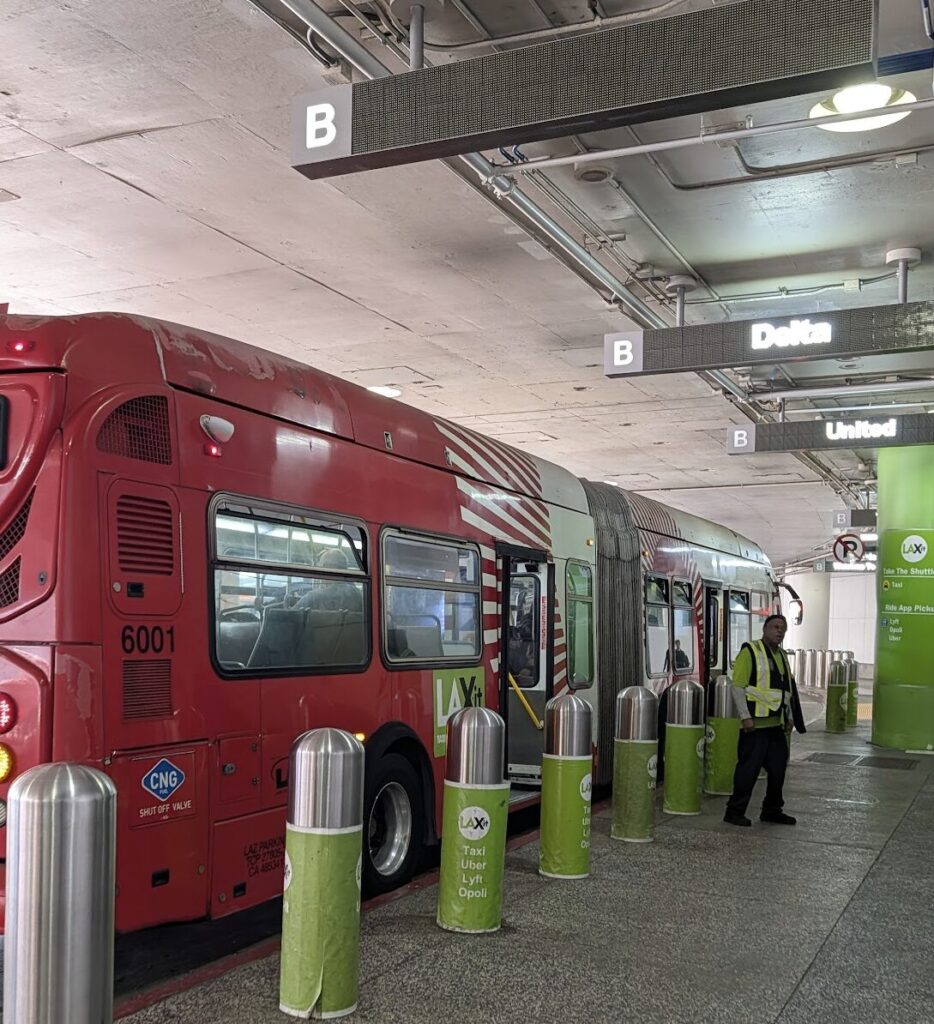
Step 2: How to Catch the Free LAX-it Shuttle
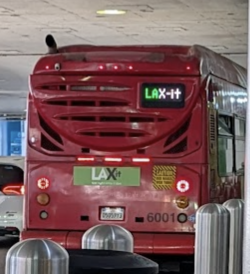
Wait near the green pillar and a bus will arrive, clearly marked “LAX-it.” That’s the free shuttle — no ticket, no reservation, no app required. Just get on.
In January 2026, the bus was red. In 2023 and 2024, it was white. The color may change, but the green LAX-it branding and the staff in green uniforms make it easy to identify.
The bus runs a continuous loop, free of charge. Large suitcases are fine — there’s a luggage rack inside. Hold your bags on turns as they can slide around.
エーテルThe bus fills up fast. You’ll get pushed toward the back no matter where you try to stand. The luggage rack is right at the entrance, so place your bags somewhere secure and grab a seat where you can keep an eye on them.
Ride time is about 10–15 minutes depending on traffic inside the airport.

One heads-up: I once waited about 20–30 minutes at the stop while the LAX-it bus drove past without stopping. My best guess is that it was either a shift change or the bus was already full from an earlier terminal. When I asked a staff member, they told me to keep waiting — and sure enough, the next bus came and picked everyone up.
The key takeaway: if the bus skips you, it’s not broken, it’s just busy. Ask the staff on the spot and they’ll confirm the wait. The shuttle runs 24 hours and always comes back.
No matter how busy it is, the next bus will come — just ask the staff and wait calmly.
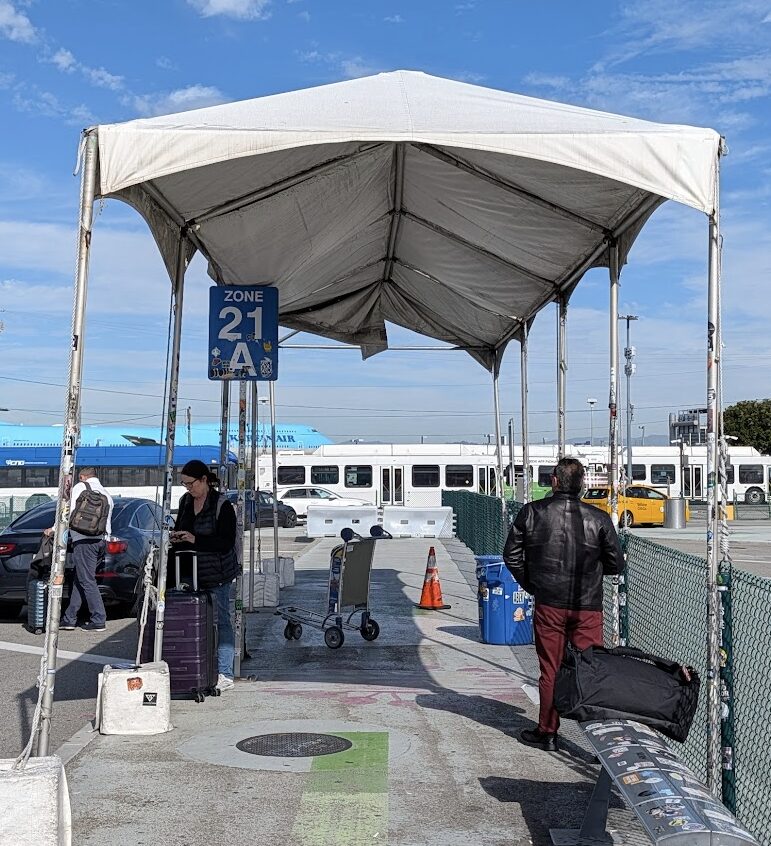
Step 3: Booking Your Uber at LAX-it
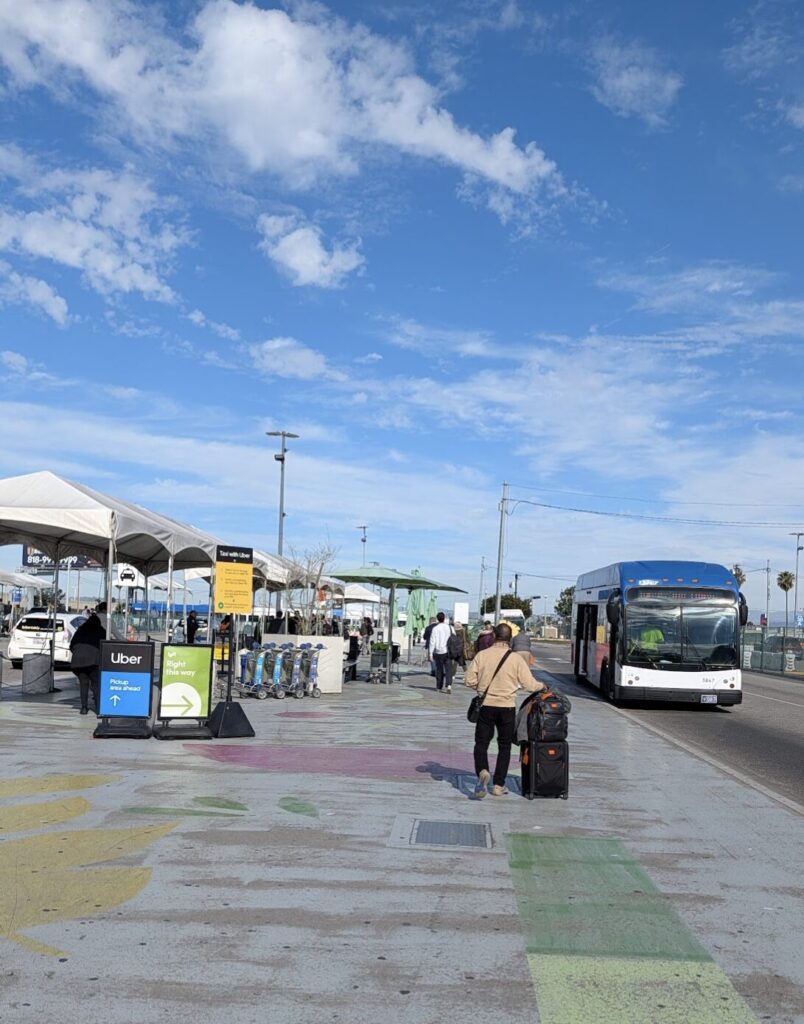
When you step off the shuttle, you’ll find yourself in a large open lot with clear signage for Taxi, Uber, and Lyft. Head to whichever section applies to you.
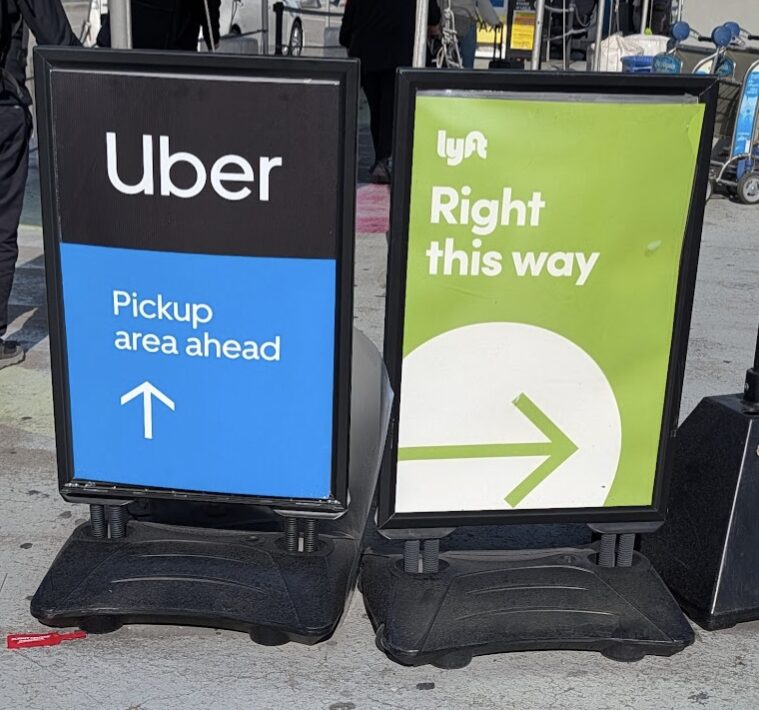
How to Request Your Ride in the Uber App
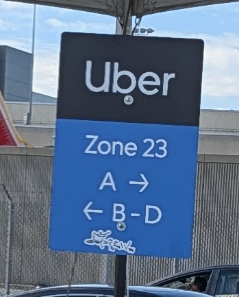
Open the Uber app and enter your destination as usual. The key difference here: you must select a pickup zone.

Large numbered signs throughout the lot match what appears in the app. Simply choose the zone that matches your current position.
The booking flow from there is standard:
- Enter your destination (e.g., your hotel)
- Choose your ride type: UberX for standard; UberXL if you have 3+ large bags or are in a group
- Select your pickup zone
Once confirmed, the app shows your driver’s name, car type, and plate number. Wait at your zone, spot the car, verify names, and you’re on your way.
エーテルUber sometimes shows a PIN to share with your driver instead of name matching. In all my trips to LAX, I’ve never seen this — the license plate has always been enough. But if a PIN appears, just show it to the driver and you’re all set.
[Critical] Why You Must Have Data at LAX-it — No Exceptions
The single biggest risk at LAX-it is losing your data connection.
Here’s why this matters more at LAX than almost any other airport: LAX-it is a large, open-air lot, completely outside the terminal buildings. There is no airport Wi-Fi out there. If your data connection drops at that moment, you cannot:
- Request a ride on Uber
- Communicate with your driver
- Look up your hotel address on Google Maps
- Display your digital Dodgers ticket at the gate
You are completely stuck in a parking lot, with your luggage, at night, in an unfamiliar city.
I always set up an eSIM before leaving home. Because of that, I had full signal the moment my plane landed — and I was able to book my Uber during the shuttle ride, so the car was practically ready when I arrived at the lot.
“I’ll find Wi-Fi when I get there” is a strategy that will fail you at LAX. Don’t risk it.
I’ve published a detailed speed comparison of eSIM options tested in California — worth reading before you decide which to use.

Wrap-Up: 3 Steps to Get Out of LAX Without Stress
Once you know where to go, LAX-it is not complicated at all.
- Exit the terminal → head for the green LAX-it pillar
- Board the free shuttle → ~10–15 min ride to LAX-it
- Open Uber, select your zone, confirm your ride
Those three steps are all it takes. Handle the airport transfer smoothly and you can focus on what you actually came for — a productive business trip, a Dodgers game, or everything else LA has to offer.
FAQ
- Can I walk to LAX-it instead of taking the shuttle?
-
It’s walkable from terminals 1, 2, and 7, but the shuttle is strongly recommended if you have luggage. It’s free and runs constantly — no reason not to use it.
- When should I request my Uber?
-
Wait until you’re physically at LAX-it. If you request too early and your driver arrives before you do, you risk a no-show cancellation fee once the wait timer expires.
- What if I pick the wrong zone?
-
Most zones are within walking distance of each other. If there’s any confusion, consider canceling and rebooking with the correct zone — it usually resolves quickly.
- What if the shuttle bus keeps driving past without stopping?
-
This can happen during shift changes or when earlier terminals have filled the bus. Ask the LAX-it staff member at your stop — they’ll confirm the wait and flag down the next bus for you. It runs 24 hours and always comes back.
Written by AetherBizTraveler — 10+ years in international business, 20+ countries visited. Based on firsthand experience at LAX in January 2026
\ 最新情報をチェック /

コメント